Wanting to find an effective way to remove the husk, I turned to Google. Now, I'm no Google novice, but I couldn't find a useful site to help me; I felt like a caveman! After complaining on facebook, I decided to record the steps I take in hopes that they're helpful to some other cavemen (or cavewomen) out there. Enjoy:
How to Remove Coconut Husk
Coconuts grow in a protective husk which helps them to not crack when they fall. This picture shows three larger coconuts in their husk and two more familiar coconuts without husks.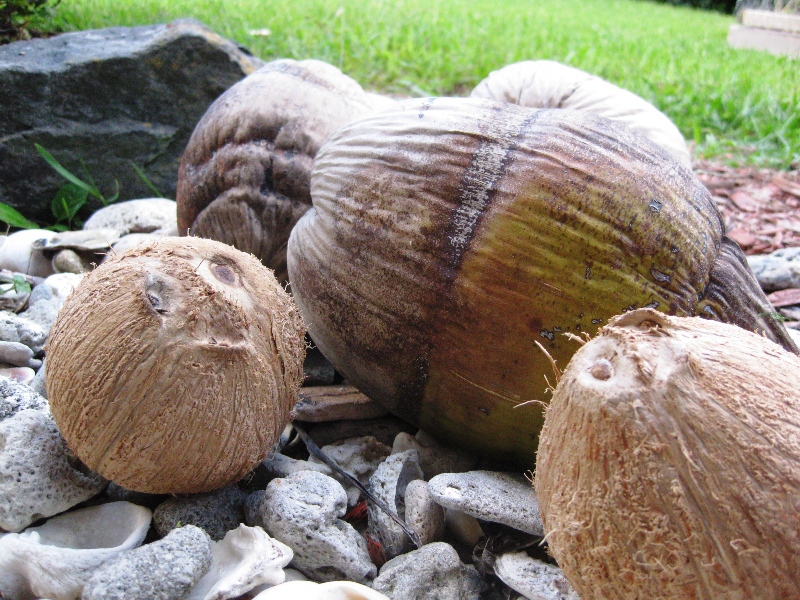 |
| Coconuts in husk (rear) and out of husk (front) |
- Identify Heavy End and Get Claw Hammer
One end should be more heavy and dense around the coconut; this side is shown at left in this picture

The coconut tips because one side is heavier - Use Hammer to Pulverize Light End of Coconut
Don't worry too much about the coconut inside; it survived the fall from the tree—is should survive this step
Pound the end to soften the husk - Use Claw End of Hammer to Make Trenches
These lines of trenches will help in tearing off the husk in later steps
Score the husk with claw end of hammer - Tear Off a Strip of Husk
Start at the lighter end, grab a thin strip of husk, and PULL!
Tear off strip of husk to reveal hard coconut buried inside - Tear Off More Strips of Husk
Make your way around the coconut, one thin strip of husk at a time
Tear more strips off around coconut - Remove Coconut from Husk
With all the husk removed, the recognizable coconut is revealed
Here's the coconut you're familiar with - Prepare to Drain Coconut
I use a drill with a 1/4" bit (drills are fun, but a Phillips screwdriver works just as well) to make holes
Get a container to preserve coconut water, if you like, or suck out the water with a straw (if you like the taste)
Gather tools to drain coconut - Make Two Holes in Coconut
Two of the three circles are usually smaller and closer together; these are the "eyes." The third is the "mouth." Drill two holes, one in the mouth (easy because it's larger and softer) and one in an eye (a little harder; it's smaller and harder)
Drill holes in mouth and one eye (of the coconut, of course) - Drain Coconut Water
My little helper simply tipped the coconut and the water drained into the measuring cup
Capture coconut water in container - Inspect Water for Cloudiness
Clear water indicates the coconut is good, cloudy water equals a bad coconut (throw the water and coconut away if the water is cloudy). If the water is clear, reserve it for later use if you would like.
Clear water means the coconut is good - Remember to Have Fun
Harvesting and preparing coconut flesh is a time-consuming process, so take a break and have a smile
Get the last few drops of water

Juggle if you have three or more coconuts - Harvest Coconut Flesh
I tried cooking the coconuts at 350° for about 20 minutes to help separate the flesh from the hard shell. It might crack the coconuts, but they're going to be cracked at some point anyway. (Note: there are hundreds of sites giving advice on how to open coconuts and harvest the flesh. I wanted to have at least one record of how to get the coconut out of the husk, so I'm skimming the rest of the steps)
Coconuts in oven to (350°, 20 min) to help separate flesh from shell

Cracked after cooking - Prepare Coconut Flesh
Once you get the flesh out of the hard shell, you'll see there's a softer shell outside of the white flesh. A vegetable peeler helps remove this tougher skin (it's fine to eat, but pure white coconut is so much more appetizing).
Remove skin with vegetable peeler - Process/Blend Coconut Flesh
Place coconut flesh and coconut water in a blender or food processor. Process until smooth.
Process coconut flesh and coconut water

Blend/process until smooth - Soak and Strain
You may want to add a tablespoon of sugar to the mixture (for three coconuts) and let it soak for about 30 minutes. Strain the coconut flesh from the liquid (which is now defined as coconut milk).
Strain the coconut milk from coconut flesh - Spread and Dehydrate
One option is to spread the flesh on a cookie sheet and bake at 250°until it is as dry as you prefer it. (I turn the flesh every 10-15 minutes while it's in the oven.)
Coconut ready for dehydrating - Enjoy!
Homemade coconut!
Even better than store-bought


Extra:
Here are the finished products in the light of day (I finished the process after the sun had set):
And here's what we enjoyed for breakfast: Starfruit-strawberry-coconut smoothies!

I think we'll have coconut curry for dinner tonight...


3 thoughts
okay. I'm officially jealous!
But you forgot to put the lime in the coconut and drink them both up...
That's great! We've been singing that song for the past couple of days--even the littlest ones. We made starfruit-strawberry-coconut smoothies (see the post update for pictures) for breakfast, but didn't use any lime :( It's a shame, too, because our baby key lime tree has some fruit that are getting fat.
Thank you for this, I have been googling in an attempt to use the many coconuts that have fallen from the trees in the yard of my new home and I will be following your process. :)
Post a Comment